Interior Painting: It’s All in the Prep Work!
Are you one of those productive people who is always looking to complete their next project? Yeah, me either! Let’s just say though that you were feeling a little squirrely and wanted to see what it took to paint one of the rooms in your house.
Now, I’m not going to lie to you and tell you it’s simple. “Paint Your Home in Five Easy Steps!” is misleading. If you do it right, it’s not simple. You see, I do this for a living and we painters work hard to do a professional job. While I would love to earn your business, that doesn’t mean I won’t share with you some details on how to do it on your own if you’re so inclined.
People think painters spend a good majority of their time with a brush, roller or sprayer in their hand… Really, we spend a majority of our time prepping a space to make sure everything is clean, covered, sanded, primed and taped off! Besides technique, that’s the difference between an amateur paint job and a professional paint job – the prep work.
CLEANING
This is probably the least fun, but most important step. If you slack off here, your paint won’t adhere as well and you will find debris in the finished product. Not to mention, your paint might be discolored or splotchy in places. Make cleaning easier on yourself and get out the vacuum! Brooms aren’t always efficient at getting out all the dust bunnies from the nooks, crannies, and corners.
Make it more labor-intensive by getting on your hands and knees and scrubbing with a wet cloth works well! I’m only joking, but it’s a possibility if you don’t have the proper tools.
Easy DIY cleaning solution: In a spray bottle, mix in a few tbsp. of laundry detergent and then fill the rest with water and voilà!!
TAPING
Unless you painted professionally in a past life, I highly recommend taping off edges. Many professionals use a technique called “cutting in” and skip taping altogether. Just know that this takes a steady hand, a great brush, lots of practice and a few mistakes before you can master it.
For those of us who don’t want to spend the time learning how to cut in, there’s tape! Who likes taping and putting in all that extra time before the actual work of the painting? Practically no one. But you will find a way to overcome that if you want clean lines and less mess!
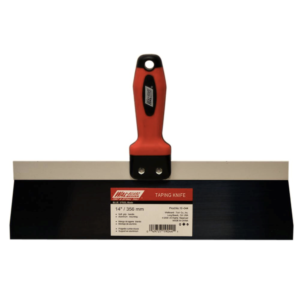
Your other option is use a drywall taping knife. You use it as a barrier to avoid getting paint on other areas. Shove it up against the edge you would normally tape off. Keep it at a slight angle and move it along with you as you paint. Think of it as a movable tape. A combination of this technique and an angled brush will be your best bet for good looking results.
Here is a bonus tip: If you are wanting to use the drywall taping knife, use a wet wash cloth to periodically wipe it off. Or get super fancy and use some blue painter’s tape to mask off edges you know will be exposed to paint and peel off for an easy clean up!
PROTECTING
Again, do not try to cut corners here. You have the option of moving furniture and belongings into another room, or you can cover them. There’s really no middle ground here. The easiest way to protect them is by covering them! You can do this by purchasing painter’s plastic, a tarp or canvas drop cloth. You can also get resourceful and use something you already have at home.
DIY COVERS:
- Cut open a garbage bag and spread across furniture and floors.
- Top sheets! I know that I never use any of my top sheets. They end up in the closet collecting dust. Use an old sheet as your tarp. If you spill paint, allow the top sheet to dry outside and then fold up for another time!
PAINTING
Now you may or may not be ready for painting at this point. Consider whether or not you may need to use a primer. If you have an unfinished, “raw” wall, you’re going to need primer. Maybe even a few coats.
If your wall was previously painted with a similar paint (latex usually) in a similar or lighter color, you can probably go without. Remember if you are painting straight from the bucket, not to completely submerge your brush in the can. You really only want to dip it in 1/3 of the way. An easier option would be a roller and a paint tray.
Bonus: If you are really in the thrifty mode, you can use plastic wrap to line your painting tray and get multiple uses out of it!
Make life even easier on yourself – give us a call to help with your painting project! We have over 25 years of experience and can help with any part of the process. We are located in Breckenridge, CO but serve the surrounding areas. We can be reached 24/7 at 970 418-5368 cell or 970-547-9778 office.