Peak To Peak Painting

How to Protect Your Home from Snow

One of the great things about living in Colorado is the snow that falls during the winter. However, this same lure can bring about costly expenses if your home is not protected from the perils that can come with snow. Taking the steps before the damage occurs is the best form of protection against the dangers of Mother Nature.

Snow Removal Tips

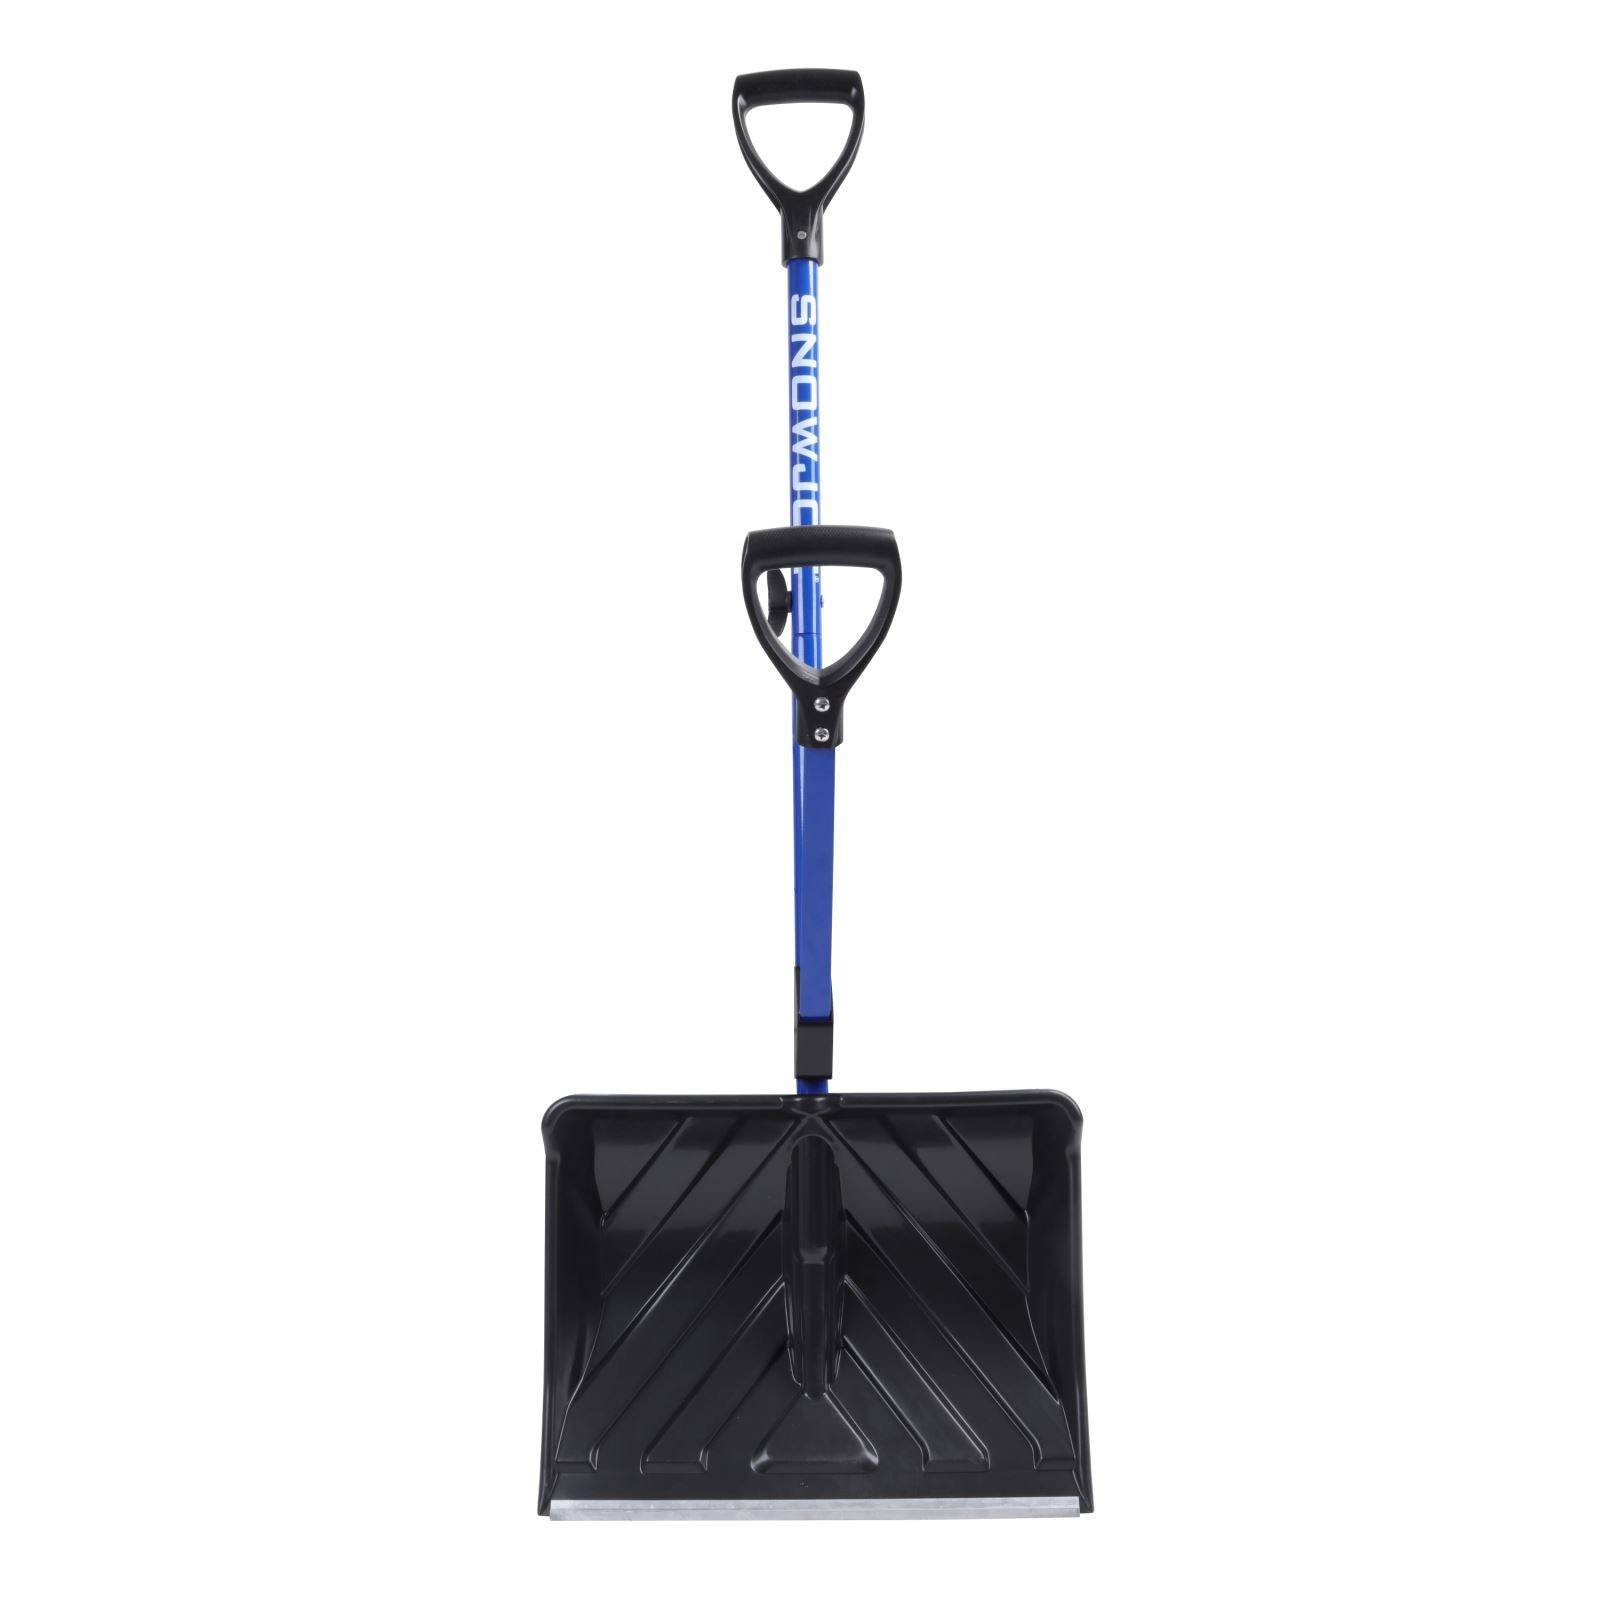
While packed powder might be what you are looking for when hitting the slopes, it can be damaging to your home, which is one of the biggest investments for many people. To ensure that the winter weather does not affect your ability to live comfortably in your home, you will want to keep the snow away from your house. Some ways to address this issue is to shovel snow away from the exterior walls, as well as using a roof rake to prevent the excessive weight of the snow from piling up on your roof. Doing so will also help to prevent leaks in your ceiling when the snow begins to melt.

Wind often accompanies winter snow storms, which can make snow removal challenging. Not only can wind blow snow up against your houses’ exterior walls, it can also bring the outdoors in, but not in the way that some people desire. When your windows and doors are not sufficiently insulated against the weather, it can drive snow drifts inside, as well as cold air, which can result in a less than comfortable living environment. Using caulking and weather stripping can help to reduce the chilly drafts that can result from the presence of gaps around your windows and doors.

Although most of the slopes are open and running in Breckenridge, your home can still experience a melting of the snow that might have piled up on your roof. When this happens, it can lead to the formation of an ice dam, which can clog your gutters, reducing the ability for the water to run off from the roof. When the warm air of your attic combines with the cold temperatures of the packed snow at your roofline, it can result in the melting of the snow, which then refreezes once the now melted snow meets the cold edge of the roof (also known as ice dams).

Due to the large amount of snow that routinely falls in the Breckenridge area, many of the houses do not have effective gutter systems, which can lead to leaks and costly repairs if the ice and snow is able to remain caked on your roof. Some ways to reduce the risk of ice dams include using insulation against air leaks in your attic, ensuring that you have over 8” of insulation, with blown-in cellulose and fiberglass better bets, and adding vents in your roof and/or soffits to assist in the cooling of the attic.

Tips for Next Winter

An ounce of prevention can lead to a decrease in the likelihood that you will need to complete extensive repairs once the snow season starts, as well as when the last flake falls. If you were not able to get to your outdoor pipes before the snow season started, now is the time to protect your pipes. This can be done through wrapping your pipes with heat tape and covering your outdoor faucets with insulating materials.

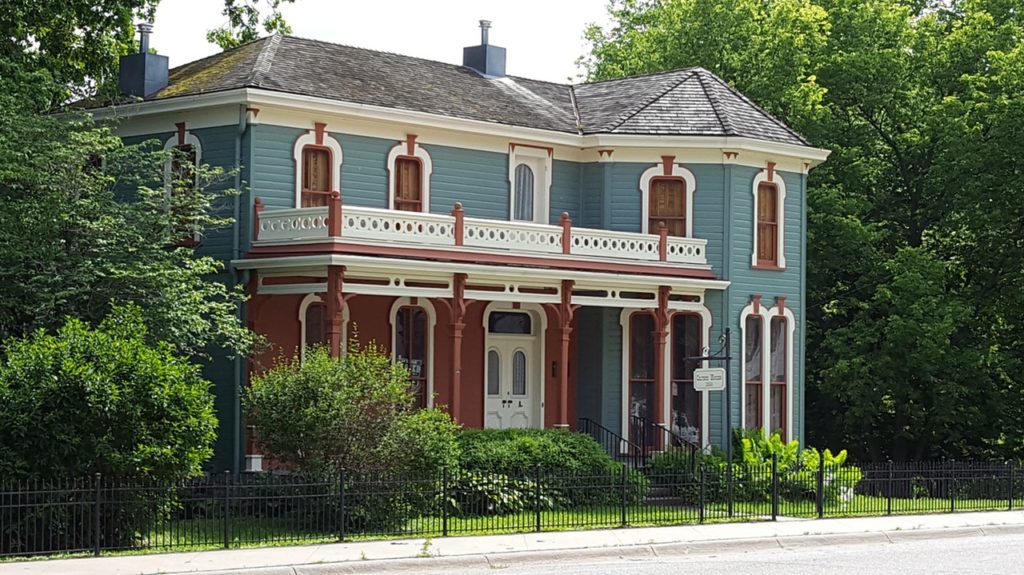
Ensuring that the exterior of your home is prepared for the next winter snow season can let you keep the chilly temperature outside. Some steps that you can take before the next snow season include using durable paint that can stand up to the harsh winter elements, as well as caulking your windows to reduce drafts, and tending to any siding that may allow the cold weather and dampness through to your interior walls.  The off season is also a good time to hire a professional to examine and fix any issues that may make it difficult to stay warm during the winter.

Conclusion

The harsh temperatures of the Colorado winter can lead to the peeling of exterior paint, which, in turn, can lead to costly repairs, not to mention cool drafts inside. Through repainting the exterior of your house during the Spring, you will be able to reduce the effects of snow and cold temperatures, allowing you to enjoy worry-free warmth during the next winter season. Taking the steps to insulate your attic, as well as inspecting the exterior condition of your home can help you to protect your home from the amount of snow that is commonly experienced in the Breckenridge area.

References

American Home Shield. (n.d.). Protect your home against snow. Retrieved from http://www.ahs.com/home-matters/quick-tips/protect-home-from-snow-damage

The Family Handyman. (n.d.). Prevent ice dams. Retrieved from http://www.familyhandyman.com/roof/prevent-ice-dams/view-all/

Formisano, B. (2018). Ice dams: How to beat them. Retrieved from http://www.thespruce.com/how-to-prevent-remove-ice-dams-1824696

Peak to Peak Painting (n.d.). Home. Retrieved from: https://www.peaktopeakpaint.com

Property Casualty 360. (2016, March 14). 7 parts of your home to check for winter weather damage. Retrieved from http://www.propertycasualty360.com/2016/03/14/7-parts-of-your-home-to-check-for-winter-weather-d?page_all=1&slreturn=1519665218

How to Paint Outdoor Trim

Selecting the right colors for your house, including the accents and trim, can be one of the more challenging aspects when it comes to home improvement. However, this home improvement project can lead to one of the most significant impacts to the look of your home. To ensure that your hard work comes out looking pristine, there are a few tips that can make painting your outdoor trim virtually goof proof!


Step 1: Plan

So, you have selected the trim color for the outside of your home. That’s excellent! However, it is not as easy as applying paint to the surface of your home’s exterior. If you don’t take a few minutes to plan out where and what you will be painting, it can lead to an undesired visual effect. As the professionals over at the DIY Network suggest, after you decide what trim you will be painting, make sure to clean off the surfaces that you will be painting, as this ensures that your finished product comes out looking great. This step should also include masking off areas that you don’t want to paint, as well as protect nearby shrubbery from potential paint splatters, which happens to even the best of us.

Step 2: Prep Correctly

Masking off and protecting nearby plants is just the beginning when it comes to painting outdoor trim. Preparations for such a project also include scraping off old, peeling paint, as the new paint will have a hard time adhering to cracking paint. After removing the old paint that may be chipping or peeling, it is recommended that you sand and prime the surface to ensure the new paint will make your house trim look flawless. The use of a water repellent on the newly exposed wood can help to reduce the cracking that can occur when the wood expands and contracts when exposed to various weather conditions. Skipping the steps in the priming and preparation stages can lead to costly repairs, which makes prepping just as important as the actual painting when it comes to painting your outdoor trim.

Step 3: Painting the Fascia

The pop of color that can be achieved through painting the fascia a contrasting or complimenting hue can bring about a new look to your home. However, it is recommended by the professionals over at Behr to use a nylon/polyester brush to cut in along the area where the roof line or wall meets the fascia, followed by a roller brush to paint the remaining area of the fascia. Don’t forget to paint the bottom edge of the fascia, which can be accomplished with a paint roller.

Step 4: Refreshing Your Door

After the fascia has been painted, you may want to also paint the trim around your front door, including the door jam. This step also requires prepping via sanding and priming, if necessary. To paint your door trim, you will want to place your brush at the top of the frame, starting on the inside surface, then continuing until you finish the entire door frame.  During this step, you will also want to watch for any paint that may have overlapped onto the front surface of the door trim.

Conclusion

By following the steps laid out in this article, you will be able to improve the look, as well as the value of your home. The trim of your house is often what makes it “pop,” and with the proper techniques, you can also extend the life of your trim, with minimal investment required. However, if tackling this type of project seems daunting, consulting the right painting professional can help you to achieve the desired results.  If you live near Breckenridge or Vail, let us know if we can be that professional for you.

References

Behr. (n.d.). How to paint exterior trim, fascia and doors. Retrieved from http://www.behr.com/consumer/how-to/exterior/how-to-paint-trim-fascia-and-door

DIY Network. (n.d.). Exterior painting preparation. Retrieved from http://www.diynetwork.com/how-to/skills-and-know-how/painting/exterior-painting-preparation

The Family Handyman. (n.d.). Exterior painting tips and techniques. Retrieved from http://www.familyhandlyman.com/painting/techniques/exterior-painting-tips-and-techniques/view-all/

SF Gate. (n.d.). Trim techniques for exterior painting. Retrieved from http://www.homeguides.sfgate.com/trim-technique-exterior-painting-28661.html

Differences Between Exterior and Interior Paint

Paint today is not the paint of two decades ago when exterior and interior paints were nearly interchangeable.  Today, exterior paints are intended to withstand exposure to the weather and UV rays while interior paints are intended for withstanding abrasion and cleaning.  Additionally, the volume of VOC’s determines whether a paint should be used inside or out.  High VOC paints should not be used indoors…ever.  They are highly toxic and may release gas for years.  Low or no-VOC paints are designed specifically for indoor use.

When the paint is made, exterior and interior paints start out quite the same but it is the additives that make each one preferable for it’s intended application.

Low VOC paint
Image Source: Sherwin Williams

How is Paint Made?

Most paints are composed of three primary ingredients: the pigment, the binder, and the solvent.  A variety of additives may also be used to improve the paint’s primary function.  Pigments will determine the color of the paint and various pigments are mixed together to create any color imaginable.  The type of pigment that is used will also determine its suitability for indoor or outdoor use.  Pigments that are designed for interior use will not hold up outdoors and you’ll find that your perfect color will be fading long before it should.   Because pigments are solids, like a powder, you can’t exactly roll them onto a surface.  The binder’s job is to cause the pigments to adhere to one another and to adhere to the surface you are painting.  A binder, also known as resin, is the primary ingredient that determines whether a paint is designed for interior or exterior use.  Today, binders are predominantly made from synthetic plastics.  They were formerly made from rubber which is how the label ‘latex paints’ originated.   Your paint is now two-thirds of the way there but without a solvent, it’s going to be like painting syrup on a wall.  The solvent, also known as a thinner, is responsible for dissolving the pigment and the binder into a thinner, less viscous paint that applies easily and evenly.  The solvent is intended to evaporate after application.  That horrible smell that may not dissipate for days is the solvent evaporating.  Gloss paints use oil-based solvents (the horrible smell) and tend to be more opaque and thicker than water-based solvents.  Once the solvent evaporates it leaves behind the pigment, binder, and additives.  And all paint is made of those same basic ingredients.

Oil-based solvents are made from chemicals extracted from petroleum products like naphtha.  Are you old enough to remember mothballs?  Remember the smell?  Yes, that’s naphtha too.  If you’ve ever opened a can of paint that has been sitting in the garage for a long time, you’ll probably see it has separated.  The solvent will be the fairly clear liquid on top and the binder and pigment will be the thick sludge underneath.  That’s why paint has to be shaken or stirred very well.

Now that you have your basic paint, additives are used to make the paint more functional for specific purposes such as exterior and interior use.  Additives can be used to improve a paint’s strength or durability.  Additives can make a paint waterproof or rustproof or protect against the sun’s UV rays.  Additives can be used to inhibit mold or mildew and improve drying time.

The differences in exterior and interior paints come down to the differences in the binders (resins) and additives.

Both oil-based and water-based latex paint is used outdoors.  Oil-based paint resists dirt better but latex paint is considered by some to be more durable.   It is not a good idea to use oil-based paint indoors due to the toxicity of the solvents, the time to dissipate and the associated odor.  Interior latex paints are designed to hold up to scrapes, scratches, scuffs and cleaning chemicals.  Wiping down your children’s creative talents can be hard on a paint that hasn’t been designed to withstand normal household cleaners.

Oil-based paint
Image source: Sherwin Williams

Bases

Both exterior and interior paints come in the two most common bases for paint which are oil-based and water-based. Generally, interior paints are water-based (and safer to your health) while exterior paints are oil-based (for durability).  Oil-based paints are difficult to clean and their odor makes them not suitable for indoor use.  However, you can use latex (water-based) paint outdoors if it is a latex paint that is intended for outdoor use.

There is a reason why paints are labeled interior and exterior.  Exterior paints are not safe indoors and interior paints are not meant to hold up to your home’s outside conditions which can range from simple humidity to salty breezes to a beating desert sun to alpine winters to daily rain.  Use the right paint for the right project just like the pros do.  In fact, to get the very best results, before you paint consider contacting your local, trusted professional painter to see what they recommend.

Sources: via, via, via, via, via

Snow Removal Hacks when you Don’t Own a Snow Blower

Fast, efficient and safe snow removal is one of the season’s most essential tasks for those with white winters. Of course, most think a snow blower would make this a breeze, but snow blowers have their disadvantages too.  If you’d prefer more “snow-blower-free” tricks here are some alternatives:

Replace your Snow Shovel 

Your father’s snow shovel is not the snow shovel of today.  Ergonomics have played an important role in making them more efficient and much safer.  You’ll find that they even help you get the job done in a fraction of the time it used to take.
Here are two examples of new designs in snow shovels and how they’re used: Shovelution and Garant.


Don’t Blow. Roll!

Get clever.  This may not work for every type of snow, but it sure is fun to try!  One West Virginia’s man’s clever method for snow removal will have you and the kids racing to give it a try. “No lifting, no scooping” is his successful strategy.  How to have fun Clearing Snow

Heated Driveway Mats


While not generally considered a ‘hack’, having a warm place for those falling flakes to land is an intriguing, and let’s face it, happy, idea.  And depending on your age and ability, heated mats could be a really great alternative to the manual labor of removing snow. Heated mats focus on specific areas allowing you to move them where you need them.
One of the best things about heated mats is that you can buy different sizes to use to melt the snow from your walkways, porch and the ever-treacherous steps leading to your house.  When heated mats are used on steps they are laid individually and then plugged together.  And if you move you can take them with you!

De-Icers

This is more of an ice-removal hack, but it goes hand in hand with snow removal.  If possible, de-icers should be applied as soon as snow begins to fall.  If there is already significant snow, shovel it first and then use the de-icer for the best results.

You can readily pick up a commercial de-icer at your local hardware or retailer, but beware because they are generally toxic in varying degrees to the environment, pets, and wildlife and can damage concrete driveways and walkways.  Some deicers that are considered safe may actually be “less-toxic” as opposed to “non-toxic”.  If you belong to an HOA check with them first before using commercial products.

If the thought of a commercial de-icer is less appealing, consider making your own de-icer by using these main ingredients:

Vinegar

Combine 3 parts vinegar with 1-part water.

Spray or pour gently (avoiding runoff)

Rubbing Alcohol

Combine 2 parts rubbing alcohol with 1-part water.

Apply (avoiding runoff)

Dish Soap

1 tsp of generic dish liquid

1 TB of rubbing alcohol

1/2-gallon warm water

Mix the ingredients together in a bucket and pour over sidewalks and pathways (avoid the runoff).

Pickle Brine

Combine 2 lbs. of salt per gallon of water. For extra punch, add a glass of sugar beet juice to get the ultimate in de-icers.

As a reminder, salt, while organic, is damaging to both concrete and landscape so use it cautiously.

Alfalfa Meal


Alfalfa meal is typically used as a fertilizer but its hidden talent is as ‘green’ ice-melting hero.  It’s also grainy making it a great de-icer while providing traction.  It’s said to be very effective when used moderately.

Additional Convenient Solutions for Pesky Snow

Lay plastic tarp over sidewalks, walkways and the driveway in anticipation of snow.  You might not want to wait until the flurries cease to pull up the tarp.  If you’ve experienced a heavy, wet snowfall then you might find your tarp trapped as the weight of the snow will make it too heavy to lift.

In a pinch, you can get year-round use out of your leaf blower or shop vac by using them to remove that light overnight snow.

If you have ever tossed a shovel-full of snow to find it still on the shovel, then coat your snow shovel with cooking spray to make shoveling much easier.  Cover the front and back to keep snow from sticking.

Before you shovel, put a pair of socks over your shoes for added traction.

Shovel often. It’s far easier to shovel in spurts than it is to wait until it stops snowing and trying to man-handle those mountainous snowdrifts.

Hire someone.  There are many reputable, able-bodied and well-equipped individuals or companies prepared and ready to clear your driveway and walkways this season.

And last, but not least, there’s always Florida.

Sources:

https://www.doityourself.com/stry/5-winter-shoveling-hacks
https://www.greenmoxie.com/natural-green-salt-alternatives-for-melting-ice-and-snow/
https://www.thespruce.com/cost-of-heated-driveway-systems-4117474
https://www.houselogic.com/organize-maintain/home-maintenance-tips/3-hacks-make-shoveling-snow-snap/
http://www.networx.com/article/best-ways-to-clear-snow-without-a-blower

When You Should Definitely Hire a Professional Painter

Are you thinking of giving your house a makeover?  Should you do it yourself?  Should you hire a professional painter?  Let me see if I can help.

Professional Painter

When should you hire a professional painting contractor?

If you ask me, I’ll tell you every single time you are thinking of painting anything.  Not just because I want to earn your business either.  I cannot stress this enough.  If you are even thinking of painting and haven’t done so professionally before, just stop what you are doing and call a professional.  If you do not believe me, ask yourself these questions:

Do you have the right tools for the job?  The applicators, the brushes, the rollers, the drop cloths, the tape, the scrapers, and all the things you will never use again.  Is your equipment quality-made or did you get it from the dollar store?  The last time you used that super cheap paint brush did you spend the next 30 minutes trying to dig out the loose bristles from your newly painted wall and the next 30 minutes trying to cover your fingerprints?  I just described your current situation, didn’t I?

Do you know what kind of paint to buy for your project?  My friend painted his entire first floor with a paint that showed marks even if you didn’t touch it!  Neither one of us can figure that out.

Can you identify the repair work you might have to do?  Do you recognize mildew?  How about wood rot?  Moisture damage?

To get a quality look to your rooms or exterior, you need to prep the surface.  Even if you don’t have substantial damage and repairs, do you really want to tape around the trim, the ceiling, the wall plates, the doorknobs, light fixtures and windows? Do you want to clean, scrape, sand, fill holes, caulk, remove light switches, outlet covers, smoke detectors, door bells, outside lights, flag holders, house numbers and the whole basket of things that a professional painter will do to get the surfaces in perfect shape before they paint?

Are you ready to secure all of the areas of the house that are not supposed to have paint on them which will have paint on them unless you do what the pros do?  Paint has a mind of its own and will go where it is not wanted.  The pros know how to get a single room or a whole house paint-ready; and they can do it fast.

Do you want your arms, legs and back to ache?  Do you want to pick dried paint out of your hair?  Do you really want to do all of the cleanup?  Do you know your local codes for disposing of paint?  Do you want to make the calls to find out?  Do you really want to paint?  Be honest!

That is where a professional painter comes in – the firemen of all things paint-related.  The unspoken heroes.  Professional painters save you time and stress.  They yield flawless, long-lasting, beautiful results.  They make your neighbors envy you.  They know how to detail a wall, a room or an entire home to perfection.  They make even old houses look new.  They advise you on the best paints, finishes and colors for the look you want.  They know which colors add value, refresh and renew your home as well as which colors most appeal to buyers.

They didn’t watch a DIY video before they came to your house.  While those videos are helpful, a video is not going to even get you close to duplicating what years of painting know-how and experience can offer.  Painting may look easy, but it’s not… not if you do it right and want to truly transform your space.  A professionally-painted home adds value and increases its market value as well.  Paint isn’t just paint anymore. Professional painters can match your home up with the best interior or exterior paint for your home’s construction-style and location.

If you are like most homeowners that already have their own full-time job, taking on a paint project can take you weeks, even months to complete.  Professional painters already have a full-time job and are motivated to make your home their priority.

Don’t spend money twice by hiring a professional to fix the mistakes of a DIY-gone-wrong.  You have the luxury of not having to worry about accidents when you work with an insured professional painter.

Lastly, professional painters don’t just paint.  They are pros at dry wall repairs and plastering, skim coating, staining, refinishing and varnishing woodwork, decorative painting that includes color washes, glazing and Venetian plaster.

Your time is valuable and so is your home.  Do what you do best while you let a professional paint contractor do what they do best – make your life easier while they make your home, inside and outside, more beautiful.

Sources: via, via, via, via, via, via

When Painting Your Counter Tops Make Sense

Did you know you can salvage your counter tops with paint and have an affordable way to update your kitchen?  It turns out that if your current counter tops are in pretty good shape, you can paint them with your favorite color, match them to go with a new design and you can even get the expensive look of natural stone.

If you don’t have thousands of dollars laying around to redo your laminate counter tops, there are a number of new, innovative and very price-friendly products that promise to do the trick.

Giani offers a kit that costs about two dollars a square foot.  Each kit covers 35sf.  The best part of it is that you’re not limited to change if you don’t have a laminate counter top.  Their product promises work on multiple types of solid surface counter tops including tile and cultured marble.  It’s as easy as applying a primer, following the directions and using the recommended materials to make random patterns.

Painting counter tops

The prep work is very similar for the pre-packaged products as well as if you’re just using paint:

  • Clean, Sand…
  • Clean, Sand a second time.
  • Every time you sand, you must thoroughly remove all the dust
  • Clean, Sand, Paint, Sand, Sand, Add Clearcoat

Okay, I’m being a little redundant, but not by much.  Each kit will have its own special instructions, but you will generally start by thoroughly cleaning the entire surface including the back splash and face of the counter top. Start with a normal cleaning and make sure to remove any grease or greasy residue.  If your counter top has cracks, they will need to be filled and finely sanded until smooth.   Not prepping properly in the beginning will impact your results in the end.

Another popular kit is offered by Rust-Oleum.  Their kit differs from the others by creating a textured surface that has the look and feel of stone.  It uses a heavy epoxy, instead of paint, combined with a variety of decorative colored chips.  The chips adhere to the epoxy.  Their kit is formulated for laminate counter tops.

Both kits require thorough cleaning, sanding, application, sanding and are finished with a clear top coat to seal and protect the surface.  And all three of the options use a paint roller to apply.

Another very affordable option is latex paint.  It’s not restricted by the contents or colors of pre-packaged kits and comes in every color imaginable.   Painting your counter tops literally any color you want means you can adapt your counter tops to virtually any style of kitchen: contemporary, rustic, modern, country and French to offer a few examples.  Think of the beautiful possibilities.

Like the kits, the prep work is similar.  You begin with cleaning and sanding the surface and cleaning the surface again.  In this case successful paint adhesion requires priming and you will want an acrylic primer that specifies it will cover glossy surfaces.   Then you will apply enamel paint in your no-one-else-has-it-can’t-wait-to-show-it-off favorite color.  When it’s dry finish it off with a couple of applications of clear acrylic.  Remember, the more shine, the more protection against wear and tear.

The best thing about painting your counter tops is that you can make a mistake with the color and just do it all again.  Clean, sand, clean… well, you get the idea… Prime, and try another color. Voila! It’s truly that easy.

These are some easy and super cost-effective ways to make a bold change to your kitchen or bathroom counter. Let me leave you with a couple of tips and tricks that DIY’s who have successfully changed their counter tops with these methods recommend:

  • Use multiple thin coats of paint rather than one thick coat
  • Layer the thin coats a few times
  • Wait at least 3-24 hours between each coat
  • Apply the paint use a smooth surface roller
  • Use a high quality exterior paint

Lastly, and most importantly, if you are painting your kitchen counter top, make sure that you are using a FOOD-SAFE paint.

After you have updated your counter top, it’s important to protect it for several weeks until it is completely cured.  Clean it with a damp cloth… no scrubbing and never uses abrasives on a painter counter at any time.  Also, always use a cutting board to protect it.

It might be a really good idea to get out of your house or apartment while it cures and with all that money you just saved. This might be the perfect time for that long-overdue vacation!

Sources: via, via, via, via


Home Improvement Hacks for the Mechanically-Challenged

Ever found yourself feeling inspired after watching home remodeling shows only to feel deflated because you know you don’t have the know-how to accomplish something like that?  You’re not the only one!  Allow us to outline some home improvement hacks you can upgrade your home even if you consider yourself mechanically-challenged.  We’ve compiled a short list of some easy things to do inside and outside to keep your house running smoothly, looking great and building value.  You’ll be happy to know that according to the Appraisal Institute, the nation’s largest professional association of real estate appraisers, homeowners who choose upgrades instead of major remodeling projects see the greatest potential return on investment!
Indoor Home Improvements

  1. Lighten up your kitchen by giving your worn old cabinets new life. Just sand and paint.  That’s a whole lot less expensive than replacing them with new ones!
  2. Changing room drapes is a fast and affordable way to add decorator detail.  New window treatments are a cost-effective way to add a pop of stylish color. Create the illusion of height in low room by repositioning drapes and valances higher on the wall.
  3. Swap a ceiling light fixture for a lovely small chandelier. The formula for sizing a chandelier: Room width + Room length in feet = chandelier diameter in inches.
  4. If you already have an overhead light fixture in place, it’s not expensive or difficult to add a ceiling fan.  A new fan will provide much-appreciated air circulation during the hot months and help save on your electrical bill.
  5. LED Under-Cabinet Motion sensor lights are inexpensive and easy to add to any kitchen. They fully illuminate your counter space and make cooking day or night much easier.
  6. Replace your house’s tiresome drawer pulls with vintage-inspired or unconventional, blinged-out pulls that are available in a smorgasbord of shapes, sizes and colors to fit your design taste. Drawer pulls are the easiest way to give doors, cabinets and dressers and immediate facelift.
  7. Cabinet rollout storage units are one of the simplest, most rewarding and practical upgrades you can make to your kitchen space. All at once everything that’s hidden out of sight in the back of cabinets is right at your fingertips giving you instant usable storage space.
  8. Wire closet organizer systems are inexpensive, practical and easy to install. They increase your storage space and simplify cleaning too. With nearly everything hanging on the walls suddenly keeping the floor clear for vacuuming just got easy.
  9. Add bathroom accessories like a pullout mirror so you don’t have to lean over the sink, multiple-level towel bars; a luxurious towel warmer; and a self-closing toilet seat for quick upgrades to your bathroom. Everyone will thank you.
  10. While you’re at it, upgrade your showerhead with one of the latest models for ample water pressure and thrifty water usage.

Energy-Saving & Water-Saving Home Improvements

  1. Replace or add a cost-effective water heater insulation blanket to reduce your home’s energy loss.
  2. Pour a package of your choice of a brightly colored kid’s drink into the toilet tank to see if the water in the toilet bowl gradually turns color without flushing. If it does, your toilet has a slow leak. Fixing the problem is pretty easy with a new rubber flapper or a brand-new toilet kit.
  3. Adding insulation to your attic is a super-fast way to lower your monthly utility bills. Check the U.S. Department of Energy web site to see the best level of insulation for your area: www.ornl.gov/sci.
  4. Replace your washer’s old-fashioned black rubber hoses with super-strong and long-lasting braided stainless-steel hoses and prevent a ruptured hose from turning your laundry room into an unwanted swimming pool.
  5. Take control of your home’s lighting by switching lights to timers or adding dimmer switches to your wall or ceiling lighting.  Save money and set the mood all at the same time.
curb appeal
Image Source: This Old House

Outdoor Home Improvements

  1. If your front doorway is overwhelmed by greenery, it’s time to get out the shears. Replace overgrown shrubbery with zone-perfect flowering plants mixing colors, shapes and dimensions for dramatic effect.
  2. If you have a flagstone walkway, applying a stone sealant will give it a permanent shine and enhance the color.
  3. Plant a natural privacy wall.  Few things grow as fast as bamboo, but potted evergreens can be repositioned and are a bit easier to manage.
  4. A set of string lights can create a romantic mood in any backyard or turn your plain patio into a welcoming invitation for friends and family.
  5. Want to create a much more inviting outdoor dining experience?  Just add a patio heater and you could be enjoying all of your meals al fresco.
  6. You can hide that less-than-attractive air conditioning condenser with a charming wooden trellis.
  7. Spruce up the approach to the front of your house by adding a simple brick border along a plain concrete sidewalk or driveway.
  8. For an updated look outside, remove dated awnings from over doors and windows.

From one end of the house to the other these quick, affordable upgrades and simple fixes let even a novice make a big impact. So don’t let those home improvement shows intimidate you!  You can make a big impact on your home’s value without having any repair experience at all!

Sources: via, via, via, via, via

The No Fail Way to Hang Christmas Lights

If you aren’t one of the lucky ones who has a large front porch with banisters that make tying Christmas lights up a breeze, I’m sorry!  But more importantly, we can help.  Depending on how simple or beautifully complex you want to make this, we may be able to offer some helpful advice for hanging Christmas lights.

Christmas lights tutorial
Don’t hurt yourself in the name of Christmas this year!

Planning and Designing

Consider adding lights along eaves, pillars, posts, windows, and doors to highlight architectural features.

Since you probably see the backyard more than the front, consider adding lights there as well.

Decide where your lights will go and make sure you have enough lighting for that area.  Using a long measuring tape (preferably 25 feet or longer), measure the length of your house along the ground and measure its height. Next measure the lengths of the light strings you are using. Figure the number of light strings it will take for all these measurements. You don’t have to wait until you’re ready to hang the lights to get a lot of the prep work done such as running the outdoor extension cords, installing hooks, clips, hangers and so forth.

Safety First

Rushing can change your holiday plans before you know it.  Last year the Consumer Product Safety Commission reported more than 12,000 trips to local hospitals for those folks were working on their holiday lights and decorations.1

The obvious danger is falling off the roof. One safe idea is to use a vertical lifeline. The basic premise is to cast a line over the house then connect the lifeline and pull it over.  Secure the cast end to anything that will hold a heavy load. Once it’s over the house, you have a decent vertical fall safety set-up. Don’t forget to snap your carabiner or vest to it.  Outdoor lights need to be plugged into circuits that are protected by ground-fault-interrupters (GFCIs). Power stakes that are portable devices that bring power where you need it will keep you from running cords everywhere.

Quick Safety Reminders

  • Never use lights intended for interior use outdoors.
  • Don’t rig things together that are not supposed to go together.
  • Always put transformers and light changing controllers indoors to keep them protected from the elements (unless they are designed for outdoor use).
  • Never overload power points.  This is one of the most common causes of fires.  Choose plastic hooks to mount your lights instead of nails, staples or screws.
  • Never connect different types of lights on the same circuit or outlet.
  • Read manufacturer recommendations to determine the number of lights you can safely string together.
  • Hang a bucket with an S hook to connect to the ladder to hold supplies.
  • Before you put your foot on that first rung of your ladder, stop and check the lights for signs of wear, damage, frayed wiring and burned out bulbs.

Make Sure You Have The Right Equipment

We’re not building a house but we don’t want to burn one down either so: Mini-lights are the most popular today because they are inexpensive to buy and to operate thanks to their low voltage bulbs. The larger bulbs get very hot and use considerably more energy than an equal number of mini-lights. On the other hand, the larger bulbs are heavier-duty and are more reliable than mini-lights. To extract a broken mini-light bulb, unplug the string, wear gloves and use long-nose pliers and pull it straight out.  Larger bulbs typically unscrew. Retest the string to make sure all the lights work. If they don’t, then check it for a blown fuse. If the fuse blows more than twice, replace the entire string.

Use a switch-controlled outlet or plug the lights into an outdoor-rated automatic timer. Check to be sure that the receptacle’s circuit and the automatic timer are rated to handle the combined amperes of all the light strings. Short strings of 50 lights are generally better than longer 100+ light strings because it is easier to replace a short defective string than a longer one. Check all of your string sets to ensure that they are UL-approved for outdoor use. Lastly, you’ll need a heavy-duty extension cord because those lights never come with enough slack to reach the outlet!

Time to Hang Your Lights

The best time for hanging Christmas and outdoor holiday lights is before your weather turns wet and cold. It’s much easier and a lot more comfortable to work outdoors on milder days.

Set up an extension ladder and place it firmly on flat ground and extend it well above the eaves.  Lean it against the eaves at an angle that will be comfortable and safe to climb.  If the ladder has to lean directly against the gutter, then place a short piece of 2 by 4 inside of the gutter for reinforcement.

Using plastic clips made for hanging Christmas lights, hang the lights along the eaves. Your goal is to hang lights as safely and easily as you can without creating more work for yourself by marring your home’s trim or walls.  Attach the lights to the trim. Space the lights about 12 inches apart or whatever you prefer. Do not use nails or staples to hang the lights because they can pierce or nick the protective insulation and create an electrical hazard. For other options you can check your local retailer or your favorite online store for Christmas lights hanging poles and other cool inventions for hanging your Christmas lights up easy and safely.

Merry Christmas and Happy Holidays everyone!

Sources:1.via, via, via, via, via


Home Improvement Ideas to Increase the Value of Your Home

Adding value to your home can be easy! Here are some home improvement ideas to keep in mind when trying to add value to your home.

Home Improvement Ideas

Curb Appeal

First impressions matter! The outside of the home is like the cover of the book. It is what is going to draw buyers in. When you have an unkempt yard, it will immediately drop the value of the home because people assume what is on the outside of the home reflects what is on the inside.  Home improvement doesn’t just mean the home itself!

Here are our recommendations when it comes to increasing your home value by upgrading your curb appeal.

The Basics

Home maintenance tasks should also be tackled immediately. Home buyers expect certain things to be maintained in a home. Don’t neglect your beat-up deck or dented garage door.  Especially because it can be such an easy improvement to your home.  You may think you can procrastinate on these tasks when you live at the home, but a potential buyer will not take kindly to this.  Each home buyer has a set price in mind when buying a home which should not include the cost of basic maintenance projects.

The Kitchen

Inside the home, the kitchen is absolutely one of the first places a buyer likes to look. Any kitchen update will immediately add value to the home. Kitchen remodels and updates is where you will make up a greater percentage of your investment.  You do not have to make it a major home improvement, but consider the fact that the kitchen is the most common space where families will congregate.

Quick fixes: adding a back splash, changing knobs on cabinets, adding molding to old cabinets, re-staining cabinets, upgrading old fixtures, etc.

Here’s Buzzfeed’s list of quick DIY fixes!

The Bathroom

We would say that the bathroom is another room that adds value to the home. Outdate walls, fixtures, and cabinet can take a toll on the value of the bathroom. Small bathroom updates give you a bigger return for your money. Even a simple change, like a new coat of paint, can make a HUGE difference.

Home Improvement Tasks to Instantly Add Value

$100 and under

Updating walls with a fresh coat of paint

Re-staining old cabinets

Planting a tree outside

Adding low-maintenance plants (inside and out)

Polishing the floors or updating the grout

$200-500

Hiring a house inspector

In most cases, home buyers will want a home inspection before purchasing! This will give you allow you to get a jump start on any problems that a buyer may encounter with a home. If the home inspection is free and clear buyer are more likely to purchase.

$700-1000+

Updating kitchens appliances

If you must choose, upgrade the stove top versus the refrigerator. This will add more value to the home since refrigerators are more frequently replaced.

Larger kitchen or bathroom remodels

Other bells and whistles,

Granite countertops, extra storage, new flooring, etc.

The list is endless!

All in all, it takes time to add value to your home. Plan on tacking one room at a time! This will make a larger project seem more attainable and will mitigate your stress in the interim. Just remember, any project that you accomplish (big or small) can add value to your home.


Sources:

https://www.fix.com/blog/renovations-to-increase-home-value/

http://www.hgtv.com/remodel/interior-remodel/30-tips-for-increasing-your-homes-value

https://www.buzzfeed.com/nataliebrown/tiny-kitchen-upgrades-that-can-make-a-huge-diff?utm_term=.djJAnJDvjE#.jyEaw2BzDX

https://www.thisoldhouse.com/ideas/26-low-cost-high-style-kitchen-upgrades


Make Your Laundry Room More Functional and Laundry More Enjoyable!

Whether you have a small laundry space or a tiny laundry room, the area can be both beautiful and functional. To most of us, doing the laundry is not a chore that we look forward to.  We are convinced though that doing the laundry in a beautiful, fully functional space sure makes the job more enjoyable!

A friend of mine has a two-story home and the laundry room is downstairs with the garage, two other bedrooms and a full bath.  Because hiking up and down the stairs with baskets of laundry is not her idea of a good time, she just spends the entire time doing laundry downstairs and has outfitted the laundry room with everything to make a drudgery job super easy.  So let’s figure out a way to do the same for you!

Storage

Look at all four walls and the ceiling as your source for storage. By turning your attention to all of those laundry room surfaces, you’ll find a veritable gold mine of storage possibilities. Lining walls with horizontal shelving means you can line up rows of baskets and turn that barren space into an organizer’s fantasy.  You can have a beautiful woven basket for everyone in your family.  Now that you’ve washed and dried a houseful of clothes, each member of the family can pick up their own basket of folded clothes.  You can use the rest of the space for a variety of storage containers like jars, boxes and even some vintage laundry items such as beautifully designed boxes of soap or apothecary jars. Don’t Forget About Your Doors The back of your laundry room door is often overlooked, but not anymore!  A friend of mine hung a shoe and accessory organizer made up of 24 oversized pockets on the back of her laundry room door.  She keeps everything from clothes pins to single socks to spot remover in it. It’s easily accessible, out of the way, tucked behind the door and saves valuable cabinet and cupboard space for other things.

Function

Every laundry room needs a space to fold clothes. Make sure you have finished walls, and if you don’t, give us a call!  With little effort, you can add a wall-mounted collapsible, folding table top.  If space is a premium this is the perfect solution and when not in use it folds neatly down against the wall. But if you have the space then be bold and use furniture like an old bookshelf or a corner unit. Picking up something from a thrift store is a great money saving idea. You can find items that were not designed or intended for use in your laundry room but will turn out to fit perfectly, provide storage and a surface for folding and interest.  Remember laundry rooms can be beautifully useful. Retractable Clothes Line If you don’t have the space for a hanging rod, then a retractable clothes line might be the perfect solution.  If you have delicates or other items of clothing that you want line-dried, then try a retractable line.  You just pull it out to use and retract it when you’re done.  It’s space-saving, affordable and easy to mount.

ironing board

Simple Ironing Board Holder

Easy, affordable and artful.  Place two hooks side by side and hang up your ironing board. It’s that quick and simple.

Appearance If you have an older laundry room with faded, worn cabinets that have become duller over the years, consider having them professionally painted instead of replacing them altogether.  Your local paint store will have the latest trends in interior paint colors and the skill to turn those dated cabinets into showpieces.  Be sure to finish them off with trendy new hardware. And why stop at the cabinets.  If your laundry room is the same color as the inside of your closet, think about painting it now.  Painting is the one of the simplest home improvements you can make and one of the most affordable ways to update your space.

You can choose a neutral palette that is sophisticated and contemporary like white, black and gray.  Or you can consider the science of blue.  It turns out that there is scientific evidence that a majority of people describe feeling calm and composed when enveloped by the color blue.  Bright white cabinets and counters that match the appliances can help a small area feel bigger than it is. How about a chalkboard accent wall?  Adding color may not change the size of the room, but it can definitely make it feel bigger and more fun. Once you have painted, don’t stop there. A few well-chosen accessories and a pretty rug will finish off your look! Why you might even find yourself making excuses to do laundry. 😉

Laundry can sometimes feel like the never-ending chore and since we spend hours each week in the laundry room why not make it as enjoyable as possible by renovating it with a few simple and affordable improvements to turn it into a room you will actually enjoy spending time in?

Sources:

http://www.hgtv.com/design-blog/clean-and-organize/10-laundry-room-storage-ideas https://www.homestoriesatoz.com/laundry-room/25-small-laundry-room-ideas.html https://modernize.com/home-ideas/14600/12-fresh-ideas-for-a-functional-laundry-room

https://morningchores.com/laundry-room-ideas/2/